
How to Use Audio Relay — Ultimate Step-by-Step Guide (Phone as Microphone & Speaker)
This clear Audio Relay setup guide explains how to install the Audio Relay PC app, set up the mobile app, connect via USB or Wi-Fi, and use your phone as a microphone or speaker. Follow the step-by-step Audio Relay PC guide and Audio Relay Wi-Fi connection instructions below.
Step 1 — Audio Relay PC Guide (Download & Install)
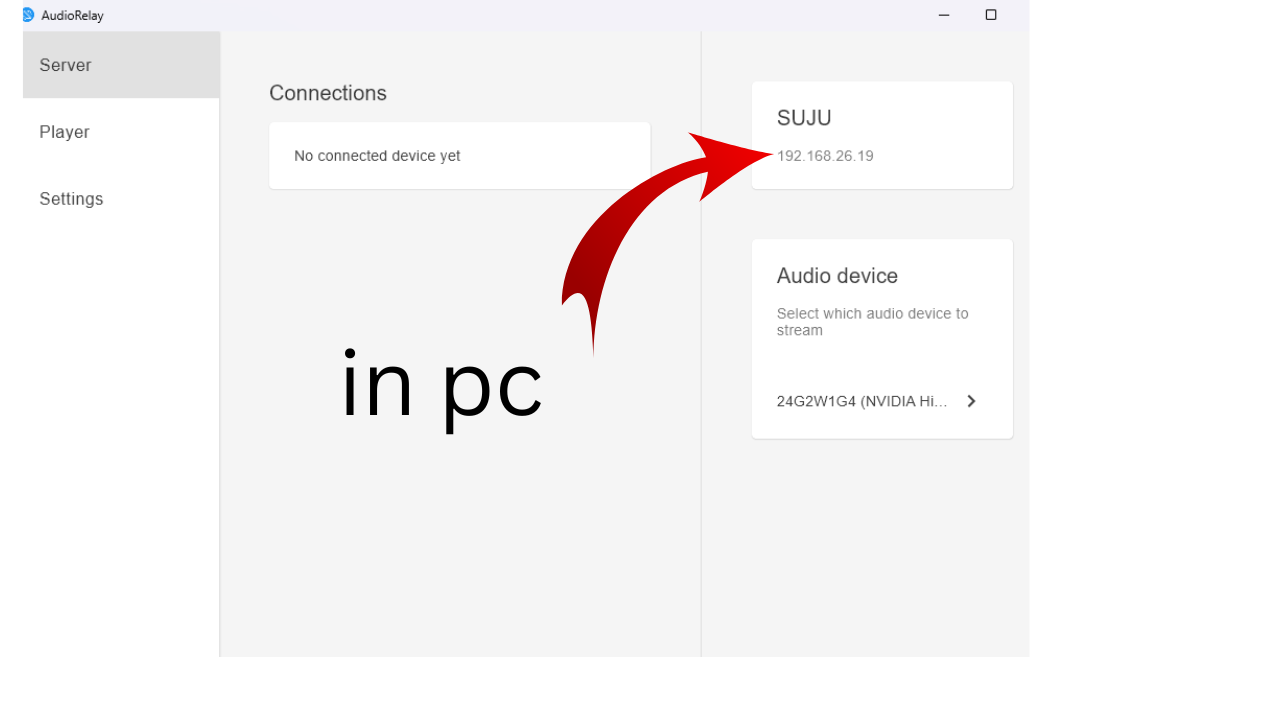
To start the Audio Relay setup on PC, visit the official Audio Relay website and download the PC installer. Run the installer and open the app. The PC app acts as the server — it shows a Server ID and available audio devices. Both USB and Wi-Fi connections require the PC server to be running.

Tip: Allow Windows audio permission prompts so Audio Relay can access sound devices correctly.
Step 2 — Audio Relay Mobile Setup (Android)
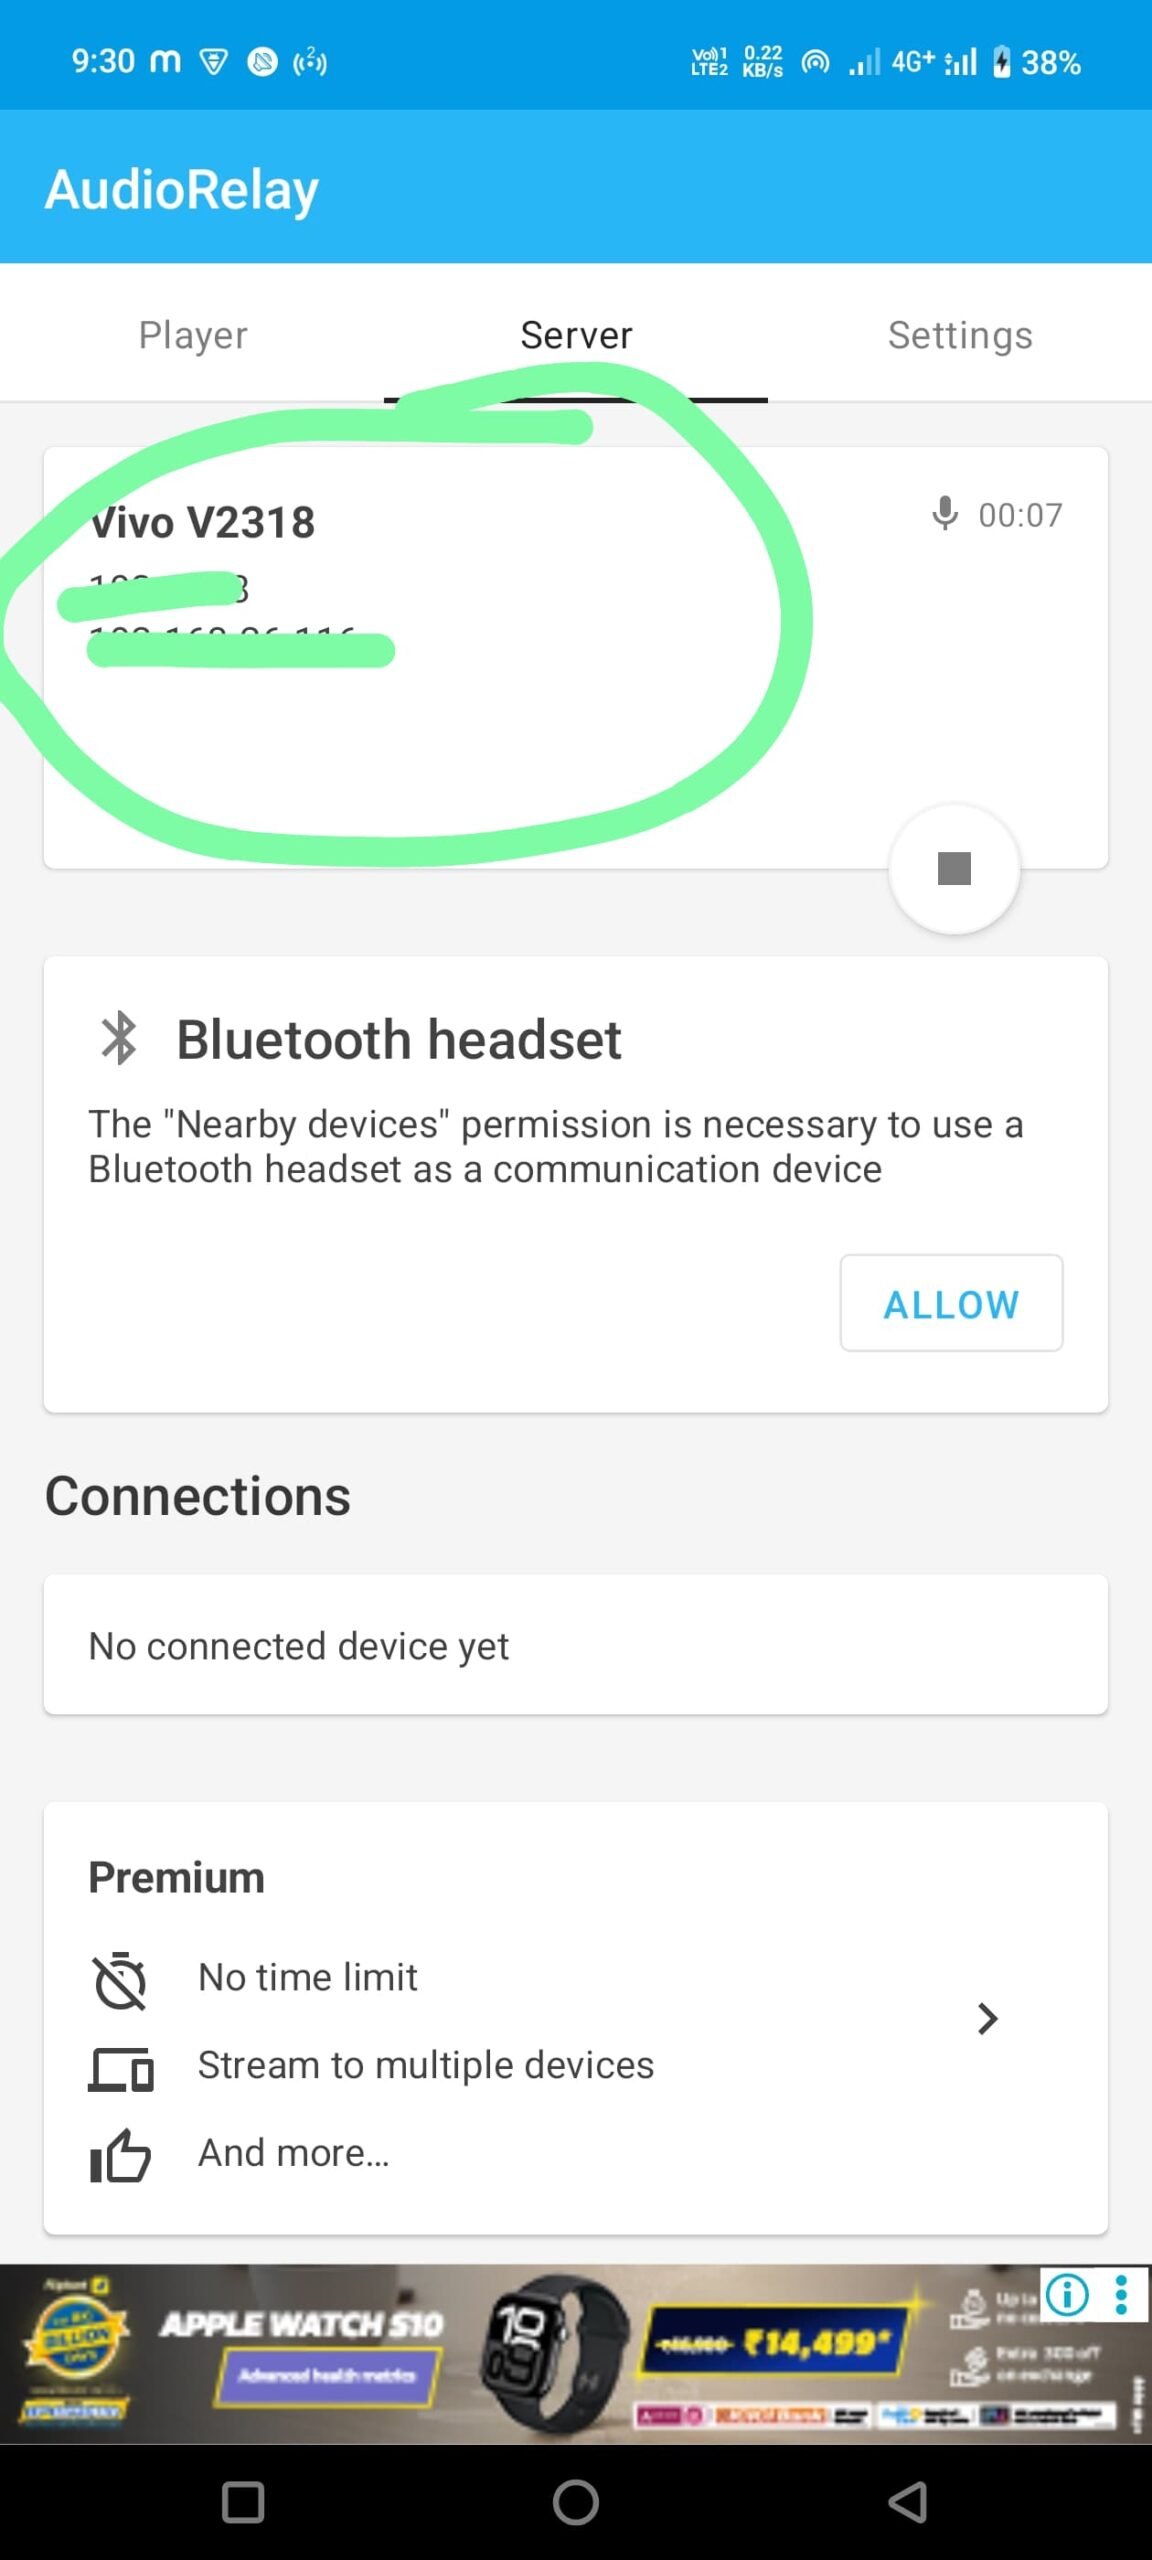
Open Google Play Store and install “Audio Relay.” After installation, open the app. The mobile app searches for PC servers automatically when both devices are on the same network. Switch between Server and Player modes as needed.

Audio Relay USB & Wi-Fi Connection Methods
USB (Wired) — Stable Audio Relay Connection
Connect your phone to PC via USB and enable USB tethering. Open Audio Relay on both devices and select the detected server. USB reduces latency, ideal for real-time mic use.
Wi-Fi — Audio Relay Wi-Fi Connection
Ensure both devices are on the same Wi-Fi network. Open the mobile app and select the PC server. If your PC doesn’t appear, manually enter the Server ID from the PC app.
Use Phone as Microphone (Player Mode)
Switch the mobile app to Player → Microphone after connecting to your PC server. On PC, select “Audio Relay” as the microphone input (Control Panel → Sound). Test in any voice app (Discord, Zoom, Voice Recorder).
Practical Tips & Troubleshooting
- Latency: Use USB for lowest latency; Wi-Fi works well on a strong router.
- Firewall: Allow Audio Relay in Windows Firewall if server not visible.
- Audio Quality: Use high sample rate on PC for better sound.
- Server ID: Manually add server ID if automatic discovery fails.
- Battery: Keep phone charging for long USB microphone sessions.
FAQs — Audio Relay
A: Visit audiorelay.net, download the installer for Windows, run it, and open the app. The Server ID will display for mobile connections.
A: Yes — ensure both devices share the same Wi-Fi network and select the PC server. If discovery fails, use the Server ID manually.
A: Audio Relay has a free tier; paid version unlocks higher audio quality and extra features.
Do you have any video of that? I’d want to find out more details.
https://youtu.be/xWE9YfRUCwc?si=FJB7faHgeJTFWz_c